2% Rule: Stop Loss Placement for Traders Tied to Dollar Risk
Risk-first stop loss placement: set stops before entry, size positions with the 2% rule, anchor to ATR or structure, and audit your stops to fix costly...

2% Rule: Stop Loss Placement for Traders Tied to Dollar Risk
Decide the dollar amount you’re willing to lose before you decide where the stop goes. Then anchor the stop to something objective, either 1.5 to 3 times the Average True Range or just beyond a support, resistance, or swing level that would prove your trade idea wrong. Never place a stop-limit order in a fast-moving market and assume you’ll get filled at your price; a stop order becomes a market order the instant it triggers, and slippage during volatility is the norm, not the exception.
TL;DR:
- Placing stops beyond support, resistance, or swing levels ensures they are only triggered if your trade thesis is invalidated.
- Using an ATR-based method scaled to your trading timeframe provides a more accurate stop distance that accounts for market volatility.
- Position sizing should be based on your maximum acceptable dollar loss, with the 2% rule serving as a common starting point for risk limits.
- Combining structural stops with an ATR buffer offers the most reliable placement by respecting both chart patterns and actual market noise.
- Setting stops before entering a trade and documenting reasons for adjustments prevents emotional decisions that can erode account performance.
Table of Contents
- What Are the Best Stop-Loss Placement Methods?
- How Do You Size a Position Around Your Stop?
- How Does ATR Help You Set Better Stops?
- Where Should a Stop-Loss Be Placed on the Chart?
- Stop vs. Stop-Limit: Which Order Type Should You Use?
- When Should You Adjust a Stop-Loss?
- What Mistakes Wreck Stop-Loss Discipline?
- How Does Trade Auditing Improve Stop Discipline?
- The One Habit That Actually Fixes Stop Discipline
- A Practical Next Step for Traders Who Want Measurable Stop Discipline
- Sources
- FAQ
What Are the Best Stop-Loss Placement Methods?
There’s no single correct answer to “where does the stop go,” because the right method depends on what kind of trader you are and how long you plan to hold the position.
- Percentage stops (risking a fixed percentage below entry) are simple but ignore how volatile the stock actually is. Good for beginners who need a rule they won’t argue with.
- ATR-based stops scale to real market noise, making them the default choice for both day traders and swing traders who don’t want to get shaken out by normal chop.
- Structure stops sit beyond a swing low, swing high, or support/resistance zone. These fit anyone trading a technical thesis, since the stop location matches the point where the trade idea is actually wrong.
- Moving-average stops trail a 20 or 50-period average and suit trend followers who want to stay in a winning position as long as the trend holds.
Mixing methods, like an ATR buffer placed just past a support level, tends to outperform any single method used alone.
How Do You Size a Position Around Your Stop?
Stop placement and position sizing are the same decision made twice. You don’t pick a stop and then figure out how many shares to buy. You decide how much money you can afford to lose, and that number tells you both the stop distance and the position size.
The 2% Rule from CME Group’s trading education is the standard starting framework: risk no more than 2% of account equity on any single trade. Here’s how it plays out on a $50,000 account:
- Maximum dollar risk is computed as account equity multiplied by the risk percentage.
- Entry price and stop price determine the risk per share.
- Position size is the maximum dollar risk divided by risk per share.
- A wider stop distance results in a smaller position size, maintaining the same dollar risk.
That 2% figure is arbitrary. CME’s own materials note the percentage is a framework, not a law, and plenty of disciplined traders run 1% or even 0.5% per trade depending on how many positions they hold at once and how correlated those positions are.
How Does ATR Help You Set Better Stops?
Average True Range measures how much an instrument typically moves in a given period, and using it removes the guesswork from stop distance. Instead of picking a round number because it feels safe, you’re measuring actual volatility and setting your stop outside the range of normal noise.
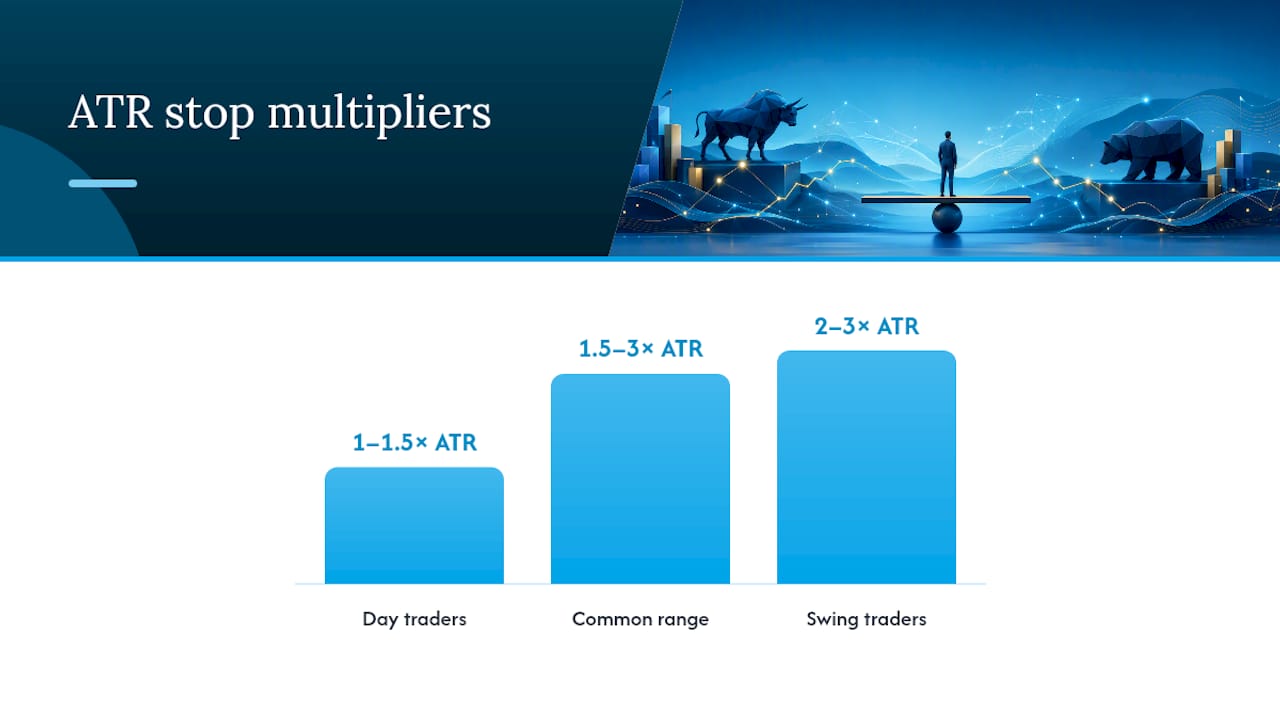
A common range is 1.5 to 3 times the ATR, with the multiplier depending on your timeframe:
- Day traders often use 1 to 1.5× ATR on a 5 or 15 minute chart, since they need tighter stops to keep risk proportional to shorter holding periods.
- Swing traders typically use 2 to 3× ATR on a daily chart, giving the trade room to breathe through a normal pullback.
- Combine the ATR distance with your position-size formula: if 2× ATR on a stock equals $1.50, and your dollar risk budget is $500, you can hold roughly 333 shares.
Caveats matter here. ATR shifts over time, so a stop set during a quiet week can look too tight once volatility picks up. Thin, low-volume markets can also produce erratic ATR readings that don’t reflect real risk.
Pro Tip: Recalculate your ATR-based stop distance each time you re-enter a setup. A stop that made sense on Monday’s volatility can be dangerously tight by Thursday.
Where Should a Stop-Loss Be Placed on the Chart?
The best stop location is the price level that proves your trade thesis wrong, not the price that limits your discomfort. Those two goals often push in different directions, and structure-based placement resolves the conflict better than an arbitrary percentage.
- For a long trade, place the stop a small buffer below the most recent swing low or below a support zone. If the level breaks, the setup no longer holds.
- For a short trade, mirror that logic above the most recent swing high or resistance.
- Moving averages work as both a filter and a stop anchor. A trend trader might exit if price closes below the 50-day average, treating the average itself as the invalidation line.
- Add a small buffer, often a fraction of the ATR, beyond the obvious level. Placing a stop exactly at a round number or exactly at the visible swing low puts you in a crowded zone other traders are watching too.
Stacking a structural anchor with an ATR-sized buffer is usually the most reliable combination, since it respects both the chart and the instrument’s actual noise level.
Stop vs. Stop-Limit: Which Order Type Should You Use?
A standard stop order becomes a market order the moment your stop price is hit, guaranteeing execution but not price. A stop-limit order adds a limit price on top of the trigger, guaranteeing price but not execution, which means it can simply fail to fill during a sharp move.
- Use a plain stop order when getting out matters more than the exact price, which describes most risk-management exits.
- Use a stop-limit when the instrument is thin or prone to gaps and you’d rather risk missing the exit than accepting a terrible fill.
- Check your broker’s specific trigger rules. The SEC notes that brokers use different reference prices, some using last-sale, others using the quote, to decide when a stop fires.
- Watch out for good-till-canceled order quirks around earnings, dividends, or exchange holidays, which can cancel or adjust standing stops without warning.
FINRA’s Regulatory Notice 16-19 flags exactly this problem: stop orders can be triggered by short-lived volatility spikes and then execute at a price far from where they were set, which is why the notice recommends firms make disclosures clearer and consider stop-limit defaults.
When Should You Adjust a Stop-Loss?
Adjusting a stop is fine. Adjusting it emotionally, mid-trade, without a rule, is how small losses become account-damaging ones.
- Trailing stops move your exit up (or down, for shorts) as the trade goes your way. ATR-based trailing adapts to volatility; fixed-tick trailing is simpler but can be too tight or too loose depending on the instrument.
- Breakeven moves shift the stop to entry price once the trade has moved a defined multiple of your original risk, often 1R, locking in a scratch trade instead of a loss.
- Partial exits let you take some profit and reset the stop on the remaining shares, often to breakeven or a new structural level.
- Re-entry rules should exist before you need them: if you’re stopped out and the setup reforms, define in advance what would justify getting back in.
Pro Tip: Log every stop adjustment with a one-line reason. If you can’t write the reason down, you probably shouldn’t be making the change.
What Mistakes Wreck Stop-Loss Discipline?
Most stop-loss damage isn’t caused by a bad market. It’s caused by a trader overriding their own rule after the trade is already open.
- Moving a stop further away because “it just needs a little more room” is the single most account-destroying habit in retail trading.
- Sizing every trade the same way regardless of stop distance, which quietly changes your dollar risk from trade to trade.
- Disabling or canceling a stop order entirely during a losing streak, hoping for a reversal.
- Using one universal percentage stop across every ticker, ignoring that a volatile small-cap and a slow-moving blue chip need very different stop distances.
Run this checklist before every entry: risk percentage decided, entry price set, stop price and order type chosen, liquidity and time-of-day checked, and broker trigger rules confirmed.
| Checklist item | Why it matters |
|---|---|
| Risk % decided before entry | Locks the dollar loss before emotion enters the picture |
| Stop price and order type set | Prevents mid-trade improvisation |
| Liquidity and time-of-day checked | Avoids slippage around the open, close, or news events |
| Broker trigger rules confirmed | Stops firing on a different price reference than you expect |
If you get stopped out, journal it, review whether the placement or the thesis was the problem, and avoid sizing up on the next trade to “make it back.”
How Does Trade Auditing Improve Stop Discipline?
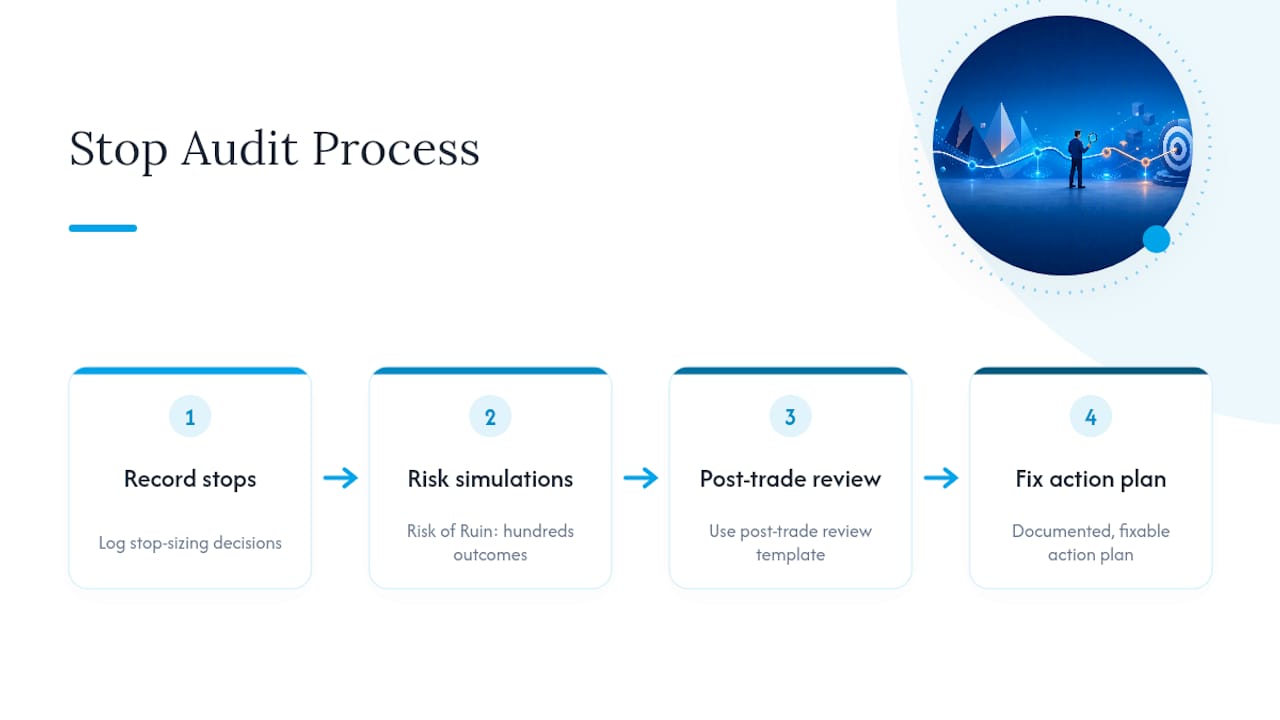
A single bad stop placement is a mistake. A pattern of tightening stops during losing streaks or widening them during winning ones is a leak that quietly erodes an account over months. Systematic auditing is what surfaces that pattern, because it puts every stop decision into a structured dataset instead of scattered memory.
Thefinaltape’s Risk of Ruin simulations show what a specific stop-sizing habit does to an account over hundreds of simulated outcomes, not just the last ten trades. Pairing that with a post-trade review template turns “I think I move my stops too early” into a documented, fixable behavior.
The One Habit That Actually Fixes Stop Discipline
Every stop-loss framework in this article collapses without one habit: setting the stop before you enter, not after. If you find yourself deciding the exit while already in the trade, the position is already emotional. Log every stop-out with a reason, never adjust a stop without writing that reason down first, and review the pattern monthly, not just after a bad week.
— DigitalPunk
A Practical Next Step for Traders Who Want Measurable Stop Discipline
Reading about stop placement fixes some of the problem. Seeing your own stop-related losses laid out in dollar terms fixes the rest. An AI Council can run a multi-agent audit across specialist analysts, reconstructing trades into a structured dataset and ranking costliest habits, including inconsistent stop sizing and late adjustments, into a prioritized Kill List with the actual dollars each mistake cost.
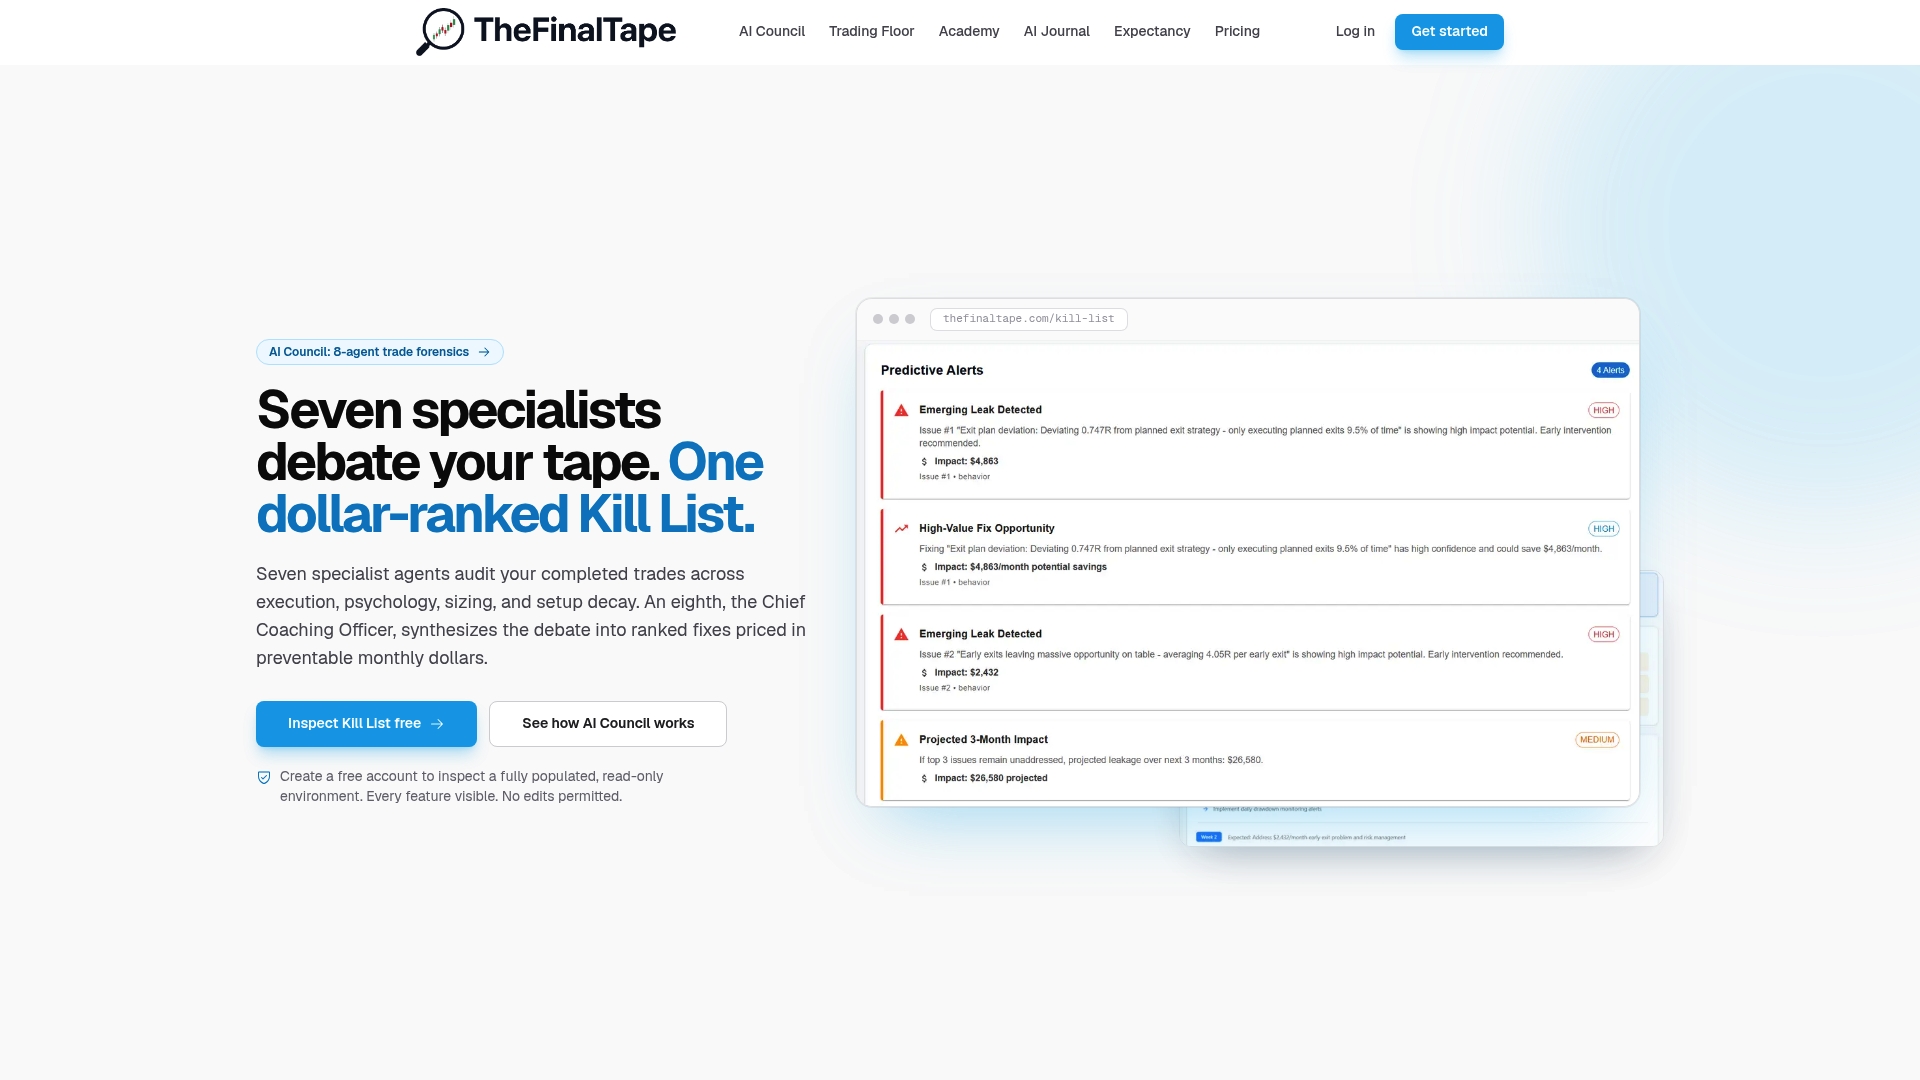
Instead of guessing whether your stops are too tight, too loose, or just placed at the wrong points on the chart, you get a debate among specialist agents that surfaces the pattern and quantifies it. The Pro plan runs $12.50 per month or $150 per year, and if you’d rather look before you commit, the Read-Only Inspection tier lets you explore the platform with no upload required. Start with the trading journal and analytics solution and see what your last month of stop-outs is actually costing you.
Sources
- Trading 101: Investor Bulletins — Special Orders and Trading Instructions (SEC)
- Regulatory Notice 16-19 | FINRA
- The 2% Rule | CME Group Education
FAQ
Where should a stop-loss be placed?
A stop-loss belongs at the price level that proves your trade thesis wrong, typically just beyond a swing low, swing high, or support/resistance zone, or 1.5 to 3 times the ATR from entry. The exact distance should always be chosen before you calculate position size, not after.
I lost a large amount of money trading. What should I do now?
Stop trading immediately, write down exactly what happened trade by trade, and identify whether the loss came from a missing stop, an oversized position, or a stop that got moved emotionally. Rebuilding capital starts with fixing the process, not chasing the loss back with bigger size.
What is the 7% rule for stop-loss?
The 7% rule is a specific percentage-based method that caps losses at 7% below the purchase price, popularized in some swing-trading systems as a simple universal cutoff. It’s one version of a percentage stop, and like any fixed percentage, it ignores the individual stock’s actual volatility.
What is a good stop-loss rule?
A good rule ties your stop distance to a dollar risk limit decided in advance, commonly 2% of account equity per trade, and anchors the stop price itself to volatility or chart structure rather than a round number. Consistency in applying the rule across every trade matters more than which specific percentage you choose.
Recommended
Stop reviewing from memory
Run compliance scoring, tag ranking, and Kill List rules on every trade — not once a month when the account feels off.